7 Tips for Choosing the Right Coloured Cable Sleeving
Choosing the right Coloured Cable Sleeving can improve cable protection, identification, and installation quality. It also affects how a finished project looks. In control cabinets, workshops, and vehicle engine bays, small details matter. A sleeve that appears suitable may tighten poorly, fray at the ends, or fade near heat sources.
This guide shares seven practical tips based on common installation experience and technical selection principles. We will consider material, diameter, flexibility, abrasion resistance, temperature tolerance, colour accuracy, and fitting methods. PET braided sleeving works well for flexible cable bundles. Heat-shrink sleeving offers a tighter finish. Split sleeving can simplify retrofits. However, no single material suits every application. Check the manufacturer’s specifications carefully, especially for temperature ranges and chemical exposure.
I once selected sleeving by colour alone. It looked excellent on the workbench, but its diameter was too small for several connectors. The installation became slow and untidy. That mistake still influences how I evaluate products. Measure the cable bundle first. Leave enough room for movement and future maintenance. Request samples when possible. Compare the sleeve under real lighting, not only in product photographs. A reliable supplier should provide clear dimensions, material details, and performance data. These tips will help you make a more informed choice, although practical testing remains important. Even experienced installers can overlook one detail. That is worth remembering.
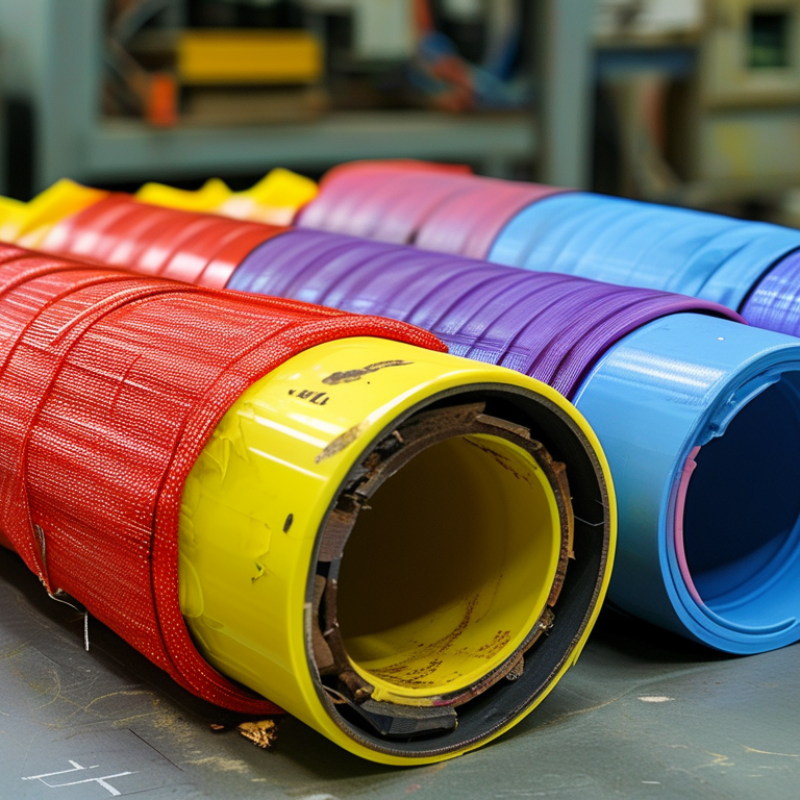
Define the Cable Sleeving’s Purpose and Installation Environment
Before choosing a coloured cable sleeving, define what the cable must endure. Is the sleeving protecting against abrasion, heat, moisture, or accidental snagging? It may also identify power, signal, or safety circuits during maintenance. Colour helps, but it should not replace labels or verified wiring diagrams.
The installation environment often decides the material. In a control cabinet, flexible braided sleeving can organise several cables and allow easy inspection. Near moving machinery, choose sleeving that tolerates repeated bending without splitting. Outdoor cables may face ultraviolet exposure, rain, dust, and temperature changes. For an engine compartment, check the continuous temperature rating rather than relying on short-term heat resistance.
Measure the cable bundle at its widest point. Then allow enough expansion for connectors and future repairs. Too little clearance causes difficult installation. Too much clearance allows the cables to rattle inside. That balance is easy to underestimate. I once selected a sleeve by bundle diameter alone, and the connector forced an awkward bend near the entry point. The protection worked, but the installation looked rushed.
Check chemical compatibility as well. Oils, cleaning fluids, and solvents can weaken some materials over time. Review the manufacturer’s technical data, including temperature range, flame behaviour, abrasion performance, and cut resistance. A bright colour may fade in sunlight, while a dark sleeve can become difficult to inspect in a crowded enclosure. Test a short section in the actual space before purchasing the full length.
7 Tips for Choosing the Right Coloured Cable Sleeving: Define the Cable Sleeving’s Purpose and Installation Environment
Temperature is one of the first environmental factors to check when selecting coloured cable sleeving. The chart below compares typical continuous operating temperature ranges for commonly used sleeving materials. Always confirm the manufacturer’s technical specification for the exact construction and application.
Selection guide: PET and nylon sleeving are suitable for general cable organisation and abrasion protection. Silicone-coated fibreglass and PTFE sleeving are better suited to high-temperature areas, such as engine compartments, industrial equipment and heat-exposed electrical assemblies.
Select the Correct Diameter, Flexibility, and Coverage Length
7 Tips for Choosing the Right Coloured Cable Sleeving
Select the Correct Diameter, Flexibility, and Coverage Length
Measure the widest part of the cable bundle, not just one wire. Include connectors, bends, and protective boots in your measurement. A sleeving diameter that is too small may snag during installation. One that is too large can look loose and shift under vibration. Allow about 10–15% clearance for a clean fit. This figure is practical, but not universal.
Check the sleeving’s expansion range before ordering. Braided sleeving often expands over fittings, while tighter designs may need careful cable routing. Test a short sample around the sharpest bend. It should flex without flattening or exposing the cables. Choose the flexibility level according to movement: rigid equipment needs less stretch, while hinged panels need more. I once selected a neat-looking sleeve that restricted a service door. It worked, but it was a poor decision.
Calculate coverage length from the cable’s finished route. Follow every curve, loop, and connection point with a tape measure. Add extra length for termination and future adjustments. Short pieces leave exposed sections. Excessive length creates bunching. Keep colour consistency in visible areas, especially near control panels and inspection points. Mark each measured section before cutting. Recheck the fit after installation, because real cable paths rarely match drawings perfectly.
7 Tips for Choosing the Right Coloured Cable Sleeving - Select the Correct Diameter, Flexibility, and Coverage Length
| Tip | Selection Dimension | Practical Measurement or Specification | Recommended Choice | Why It Matters |
| 1 | Measure the cable bundle diameter | Measure the widest finished bundle, including connectors, terminals, or protective layers that must pass through the sleeving. | Use the maximum outside diameter rather than the diameter of a single wire. | A measurement taken from only one cable can result in sleeving that is too tight during installation. |
| 2 | Select the nominal diameter | | Bundle outside diameter | Typical sleeving size to evaluate | | 3–6 mm | 6 mm | | 6–10 mm | 10 mm | | 10–16 mm | 16 mm | | 16–24 mm | 24 mm | | Choose a nominal size that accommodates the measured bundle while remaining reasonably fitted. | Nominal sizes are a starting point; the final choice depends on the sleeving's published minimum and maximum expansion range. |
| 3 | Check expansion and flexibility | Common expandable braided sleeving may expand substantially, but the exact range varies by construction and diameter. | For tight bends or irregular bundles, select a flexible sleeve with a usable expansion range that exceeds the measured bundle diameter. | A sleeve that is stretched near its limit may become difficult to route and can reduce coverage around bends. |
| 4 | Match flexibility to the application | | Application condition | Preferred construction | | Fixed cabinet or control panel | Standard braided sleeving | | Repeated movement or tight bends | Highly flexible, expandable sleeving | | Abrasion-prone routing | A tougher abrasion-resistant construction | | Prioritize bend compliance for moving cables and abrasion resistance for exposed routing. | The most flexible option is not always the most abrasion-resistant, so the operating environment should determine the balance. |
| 5 | Calculate the required coverage length | Required cut length = protected route length + installation allowance + termination allowance. | For a 1,000 mm route, a practical starting allowance is approximately 50–100 mm extra, subject to connector and end-treatment requirements. | Expandable sleeving can shorten slightly when stretched over a bundle, so cutting exactly to the route length may leave gaps. |
| 6 | Allow for connectors and end finishing | Check whether the sleeve must pass over the largest connector body or stop before a terminal, grommet, or strain-relief feature. | Use split or wraparound sleeving when connectors cannot be removed; use expandable sleeving when the connector can pass through the sleeve. | Installation method affects both the required diameter and the usable coverage length. |
| 7 | Choose colour for identification and visibility | | Colour group | Typical use | | Black or dark colours | General protection and reduced visible soiling | | Bright colours | Visual identification and easier inspection | | Distinct colour combinations | Separating circuits or cable groups | | Use a consistent colour code and confirm that the selected colour remains visible in the installation environment. | Colour improves routing identification, maintenance efficiency, and visual inspection, but it does not replace electrical labels or safety markings. |
Quick sizing rule: Measure the largest bundle diameter, compare it with the sleeving's published expansion range, verify connector clearance, and add enough length to cover bends and finish both ends securely.
Choose Colours for Identification, Safety, and Visual Organization
Choosing coloured cable sleeving becomes easier when each colour has a clear job.
Use one colour for power, another for signal, and a third for protective earth. Keep the scheme simple. In a busy control cabinet, a bright sleeve can reveal a misplaced connection before testing begins. I have found that three or four core colours are easier to remember than a rainbow. Record each meaning near the cabinet, not only in a digital file. Technicians may need that information with dirty gloves and poor reception.
Safety colours should stand apart from ordinary identification colours. Reserve high-visibility shades for heat zones, moving parts, or cables requiring inspection. Do not rely on colour alone. Add printed markers, labels, or shaped sleeves for people with colour-vision differences. Contrast also changes under low light, dust, and oil. Test a sample beside the finished installation. It may look perfect on a desk and unclear behind equipment. That is an easy mistake.
Choose the sleeve colour according to the environment, not a catalogue image. UV exposure can fade outdoor colours, while heat can darken or weaken some materials. Check temperature, abrasion, chemicals, and cleaning methods against the technical data. Grouping matching cables can make routes visually calm and maintenance faster. Still, too much matching can hide individual circuits. Leave enough contrast between neighboring bundles. Review the system after the first service visit. A colour plan that seemed logical during design may confuse the person repairing it six months later.

.svg)


